Your RV furnace plays a major role in keeping you comfortable on the road—especially when temperatures drop. But if your furnace has a filter, ignoring it could lead to poor air quality, reduced efficiency, or even mechanical issues down the line.
Let’s break down everything you need to know about RV furnace filters—from how often to replace them to what to do if your RV doesn’t have one at all.
Do All RVs Have Furnace Filters?
Not necessarily.
Many older RVs were built without a dedicated furnace filter. If your rig is over 10 years old, chances are it doesn’t have one. On the flip side, newer models may include them as manufacturers put more emphasis on air quality and system protection.
To find out if your RV has a furnace filter, check your owner’s manual. It’s the easiest way to avoid taking apart panels or removing vents unnecessarily. Some models may hide the return vent under the fridge or inside a cabinet, so don’t assume it’s missing just because you can’t spot it right away.
How Often Should You Replace the Furnace Filter?
The best rule of thumb? Follow the manufacturer’s recommendation in your RV’s manual. But if you can’t find it, here are general guidelines based on filter thickness:
| Filter Thickness | Recommended Replacement Interval |
|---|---|
| 1–2 inches | Every 1–3 months |
| 3–4 inches | Every 6–9 months |
| 5–6 inches | Every 9–12 months |
Keep in mind that these are only starting points. If your furnace seems to be straining, cycling too often, or blowing less warm air than usual, it could be a sign your filter is overdue for a change—even if you’re still within the “recommended” window.
What If Your RV Doesn’t Have a Furnace Filter?
You can still add one—and in many cases, you should.
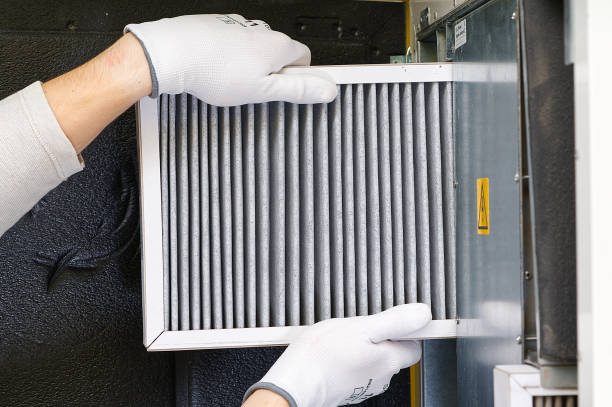
Even though older RVs weren’t designed with filters, installing one can dramatically improve your air quality by filtering out dust, pet dander, and other allergens. The key is choosing a non-restrictive filter that allows for enough airflow. If airflow is blocked, your furnace could overheat or shut off entirely.
A popular DIY workaround is to cut a standard home furnace filter down to size and secure it to the air return vent using Velcro or a frame. Just be careful—restrictive filters can do more harm than good in an RV. When in doubt, ask an RV tech for input.
🔧 Tip: If you’re not ready to install a filter, consider using a portable air purifier instead. Many units will alert you when it’s time to change the filter and help reduce airborne allergens and pollutants.
Common Air Return Locations
While locations can vary, many RV furnace air returns are located beneath the refrigerator or inside a low cabinet. This is the area you’ll target if you decide to add a filter.
Extra RV Furnace Maintenance Tips
Staying warm is just part of the equation. Here’s how to keep your furnace running clean and safe all season:
- ✅ Inspect and clean exterior furnace vents regularly. Remove dust, debris, and insect nests.
- ✅ Install insect screens over furnace exhaust ports to prevent bugs and rodents from getting in.
- ✅ Look for soot or scorch marks inside the vents—this could signal improper combustion and dangerous carbon monoxide buildup.
- ✅ Check your carbon monoxide detector. Most expire after 5–6 years. Replace them if needed.
- ✅ Vacuum behind the interior return vent and clear any blockages or dust buildup.
- ✅ Inspect all ducting for damage or disconnections.
How to Test Your RV Furnace
Once you’ve finished maintenance, run this quick test:
- Make sure your propane tank is at least ¼ full and turned on.
- Flip your thermostat to “On” and set it to a warmer temperature than the room.
- Listen for the click of ignition and the blow of warm air within 1–2 minutes.
- If nothing happens—or the furnace shuts down—turn it off and call a professional.
Final Thoughts
If your RV doesn’t have a furnace filter, don’t panic—it might not need one. But if you want cleaner air and better furnace performance, installing a properly sized non-restrictive filter could be a smart upgrade.
No matter what route you take, regular inspections, good airflow, and a working carbon monoxide detector are non-negotiables. And if you’re ever unsure, a certified RV technician can help you make the right call for your setup.


